To Do List Javascript
Javascript to do list app is a beginner level project that you must create to learn basic methods to control the webpage on the user's action and make it interactive.
In this article, we have explained how to make your first javascript project in detail with source code. This is an editable to do list using javascript.
We are going to create a basic to do list app in javascript with the following features:
- Add new task
- Delete task
- Mark task as completed
- Edit task
- Sort tasks by date
- Search tasks
Here is the final To Do list app you are going to make.
Prerequisites: Before proceeding with this section you need to have a basic understanding of HTML, CSS, and Javascript.
Making To Do List Javascript
Creating this app will be a small step to learn javascript and create projects in javascript.
We will create this app by working in 3 different section first we will work on HTML then CSS and finally for javascript.
Our complete app will look like something as shown in the picture below.

To Do List HTML Template
First, we will create the HTML structure of our app.
Create a container for our app. We will put all our elements inside this container and this container will be the parent of our app.
Give this container a class name of "container". We will use this class name to style our container.
Creating outline
Then create an <div> element with class name 'app' for the app, this will help us to style the app elements using CSS.
Create a header for the app inside an element with the class 'app'.
<div class="container">
  <div class="app">
    <h2>To DO List</h2>
  </div>
</div>
Form creation for writing task
To take tasks as input from the user you need to create a form with a text input and a submit button.
On the submit button will later be attached a click event listener to add the task to the list.
<form>
<input type="text" placeholder="Add new task...">
<button type="submit">+</button>
</form>Create task list
Now we need to create a list of tasks. To do this we will create an <ul> an element inside element with class 'app'.
Inside <ul> element we will have our list of tasks.
Each list of task contains 3 sections:
- Checkbox: To mark the completed task. Create a checkbox
- Input element: To show and edit the task
- Delete button: To delete the task. Create a trash icon using font-awesome.
To check if the task is complete create an onclick event which will listen to whether the task is complete or not, also add another onclick event to delete the task.
The following code represent the task list template (we will not insert this in HTML but its is just to visualise the task list template):
<ul>
  <li>
    <input type="checkbox" onclick="taskComplete(this)" class="check">
    <input type="text" value="My Task" class="task" onfocus="getCurrentTask(this)" onblur="editTask(this)">
    <i class="fa fa-trash" onclick="removeTask(this)"></i>
  </li>
</ul>
We have added different event listeners to the task list to use it when different action occurs.
We will use the taskComplete() method to mark the task as complete, removeTask() method to remove the task, editTask() method to edit the task, and getCurrentTask() method to get the current task value when the user is editing the task.
Complete HTML Code
Here is the complete HTML code of our app.
<div class="container">
<div class="app">
<h1>TO DO LIST</h1>
<form>
<input type="text" placeholder="Add new task...">
<button type="submit">+</button>
</form>
<ul>
<li>
<input type="checkbox" onclick="taskComplete(this)" class="check">
<input type="text" value="Exercise" class="task" onfocus="getCurrentTask(this)" onblur="editTask(this)">
<i class="fa fa-trash" onclick="removeTask(this)"></i>
</li>
</ul>
</div>
</div>HTML Output:
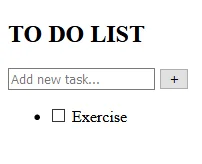
Note: The dummy data (Exercise) will be removed from the code later.
CSS Code For TO DO List App
Now let's style the To Do list app using CSS.
First, select the 'container' class, it is the first element we had created and it holds our app. Use flexbox to centre its child horizontally, give some padding and background color.
.container {
  display: flex;
  flex-direction: column;
  align-items: center;
  padding-top: 50px;
  background-color: #e1e3ea;
  height: 100vh;
  font-family: sans-serif;
}
Style 'app' element:
Create a CSS class with the name 'app' and give it a width of 60% for device size more than 768px and 90% for device size less than 768px using media query.
This will help the app to resize itself according to a different device.
.app {
  width: 60%;
}

@media (max-width:768px) {
  .app {
    width: 90%;
  }
}
Style the heading
To make the To Do app you should make the heading attractive.
You can use a different font for it. For this, you can import a google font as shown in the code below.
@import url('https://fonts.googleapis.com/css2?family=Rajdhani:wght@500&display=swap');

.app h1 {
  color: white;
  font-size: 40px;
  padding: 10px 0;
  text-align: center;
  border-radius: .5rem .5rem 0 0;
  background-color: #de3f53;
  font-family: 'Rajdhani', sans-serif;
}
Styling form and input
Use flexbox to flow the form elements in columns and give 10% width to it.
Provide basic color, padding, and other properties to input and submit button and give 90% width to input and 10% width to submit button.
.app form {
  display: flex;
  width: 100%;
  background-color: #262e4c;
}

.app form input {
  border: none;
  background-color: #3c4979;
  font-size: 18px;
  color: white;
  padding: 10px;
  width: 90%;
}

.app form button {
  border: none;
  color: white;
  background-color: #1dd2af;
  font-size: 25px;
  font-weight: 600;
  height: 42px;
  width: 10%;
}
Styling list elements
Now style the list elements that are our task. Each task element contains 3 different elements inside it.
Select <ul> tag and remove the default bullets to it by using list-style: none.
Select the checkbox by .check CSS selector and remove the original look and style it to look round using the given code below.
For checked box give different background color. i.e. background-color: #1dd2af;
Push the trash button to the right of the task using float: right property.
.app ul {
  list-style: none;
  color: #e0e0e0;
  padding: 0;
}

.app ul li {
  padding: 10px;
  background-color: #262e4c;
  border-bottom: 1px solid #3a4674;
}

.check {
  width: 0.8em;
  height: 0.8em;
  cursor: pointer;
  border-radius: 50%;
  background-color: white;
  border: 1px solid rgb(255, 255, 255);
  -webkit-appearance: none;
}

.check:checked {
  background-color: #1dd2af;
}

.task {
  font-size: 18px;
  padding: 0 10px;
}

.task:focus {
  outline: none;
}

.app ul li i {
  float: right;
  cursor: pointer;
}

.app ul li i:hover {
  color: rgb(255, 82, 82);
}
Style the completed task
For the task which is completed, we have to make it look different. So create a class 'complete' and add necessary CSS properties, which we will add to the task which is completed.
.complete {
  color: rgba(192, 192, 192, 0.8);
  text-decoration: line-through;
}
To Do List JavaScript Code
Now let's create the logic and wrote to do list Javascript code.
We are going to use localStore to store our tasks so that we can access them later.
Let's take a brief introduction to localStorage.
localStorage
localStorage is a global object that is used to store data locally on a user's computer.
It is used to store data in a way that is accessible by the user's web browser.
localStorage is a key-value storage system.
It has a limit of 5MB.
The methods of localStorage are:
setItem(key, value) - to set a new key-value pair
localStorage.setItem('name', 'John');getItem(key) - to get the value of a key
localStorage.getItem('name');removeItem(key) - to remove a key-value pair
localStorage.removeItem('name');clear() - to clear all the key-value pairs
localStorage.clear();
The javascript code for our To Do list app is mainly divided into a different function for different tasks.
Our app is going to work in the following steps:
- Load tasks: When the page is loaded, the app will check if there is any task in localStorage. If there is any task, it will display them.
- Add task: When the user clicks on the add button, the app will add the task to the list and store it in localStorage.
- Edit task: When user click on the task itself then they can edit the task and when they remove focus from the task, the app will update the task in localStorage.
- Mark complete: When the user clicks on the checkbox, the app will mark the task as completed and store it in localStorage.
- Remove task: When the user clicks on the trash button, the app will remove the task from the list and also remove it from localStorage.
For each of the above mentioned tasks, we have to create a function and call it when the user take the action.
1. Function to load the tasks from localStorage
When the user first loads the page, then we need to check if there is any task in localStorage. If there is any task, then we need to display it.
We are using the ternary operator to determine if the task is complete or not and then add the class 'complete' to the task.
// On app load, get all tasks from localStorage
window.onload = loadTasks;

function loadTasks() {
  // Get the tasks from localStorage and convert it to an array
  let tasks = Array.from(JSON.parse(localStorage.getItem("tasks")));

  // Loop through the tasks and add them to the list
  tasks.forEach(task => {
    const list = document.querySelector("ul");
    const li = document.createElement("li");
    li.innerHTML = `<input type="checkbox" onclick="taskComplete(this)" class="check" ${task.completed ? 'checked' : ''}>
          <input type="text" value="${task.task}" class="task ${task.completed ? 'completed' : ''}" onfocus="getCurrentTask(this)" onblur="editTask(this)">
          <i class="fa fa-trash" onclick="removeTask(this)"></i>`;
    list.insertBefore(li, list.children[0]);
  });
}
Function to add the task
To add a new task first create a javascript function with the name 'addTask'.
Within the function first, check if the task is empty or not. If it is empty then return and alert the user.
Then check if the task is already present in the list or not. If it is present then return again and alert the user.
If the task is not present in the list then add the task to the list and store it in localStorage.
If the task is not empty then create a new li element and set its innerHTML with the HTML
code for list element and put the task value in it using backticks.
Now append the created list element at the start of the list by using the insertBefore method.
Finally, clear the input section for the next task to be added.
function addTask() {
  const task = document.querySelector("form input");
  const list = document.querySelector("ul");
  // return if task is empty
  if (task.value === "") {
    alert("Please add some task!");
    return false;
  }
  // check is task already exist
  let tasks = Array.from(JSON.parse(localStorage.getItem("tasks")));
  // task already exist
  tasks.forEach(todo => {
    if (todo.task === task.value) {
      alert("Task already exist!");
      task.value = "";
      return;
    }
  });

  // add task to local storage
  localStorage.setItem("tasks", JSON.stringify([...JSON.parse(localStorage.getItem("tasks") || "[]"), { task: task.value, completed: false }]));

  // create list item, add innerHTML and append to ul
  const li = document.createElement("li");
  li.innerHTML = `<input type="checkbox" onclick="taskComplete(this)" class="check">
      <input type="text" value="${task.value}" class="task" onfocus="getCurrentTask(this)" onblur="editTask(this)">
      <i class="fa fa-trash" onclick="removeTask(this)"></i>`;
  list.insertBefore(li, list.children[0]);
  // clear input
  task.value = "";
}
Also add a submit event listener to the form to call the addTask function.
// Add submit event listener to form
document.querySelector("form").addEventListener("submit", e => {
  e.preventDefault();
  addTask();
});
Function to edit the task
First store the current task which is being edited to track change. So when the user focuses on the input field, the current task is stored in the variable currentTask.
Now check if the task is already there in the list. If it is there then return again and alert the user.
If the task is not present in the list then edit the task and store it in localStorage.
// store current task to track changes
var currentTask = null;

// get current task
function getCurrentTask(event) {
  currentTask = event.value;
}

// edit the task and update local storage
function editTask(event) {
  let tasks = Array.from(JSON.parse(localStorage.getItem("tasks")));
  // check if task is empty
  if (event.value === "") {
    alert("Task is empty!");
    event.value = currentTask;
    return;
  }
  // task already exist
  tasks.forEach(task => {
    if (task.task === event.value) {
      alert("Task already exist!");
      event.value = currentTask;
      return;
    }
  });
  // update task
  tasks.forEach(task => {
    if (task.task === currentTask) {
      task.task = event.value;
    }
  });
  // update local storage
  localStorage.setItem("tasks", JSON.stringify(tasks));
}
Function to mark the complete task
The taskComplete function marks the task as a completed task.
The function basically toggles a CSS class 'complete' on the <span> element of the list using the toggle method via the classList property of the element.
The function also updates the local storage by updating the completed property of the task.
function taskComplete(event) {
  let tasks = Array.from(JSON.parse(localStorage.getItem("tasks")));
  tasks.forEach(task => {
    if (task.task === event.nextElementSibling.value) {
      task.completed = !task.completed;
    }
  });
  localStorage.setItem("tasks", JSON.stringify(tasks));
  event.nextElementSibling.classList.toggle("completed");
}
Function to delete the complete task
The trash button is used here to delete the task. Same as the previous function the event parameter point to the trash button.
Finally, update the local storage by removing the task from the list.
function removeTask(event) {
  let tasks = Array.from(JSON.parse(localStorage.getItem("tasks")));
  tasks.forEach(task => {
    if (task.task === event.parentNode.children[1].value) {
      // delete task
      tasks.splice(tasks.indexOf(task), 1);
    }
  });
  localStorage.setItem("tasks", JSON.stringify(tasks));
  event.parentElement.remove();
}
Source code of To Do List App
Here is the complete source code of To Do list app.
<!DOCTYPE html>
<html lang="en">
<head>
<meta charset="UTF-8">
<meta name="viewport" content="width=device-width, initial-scale=1.0">
<title>To DO List</title>
<link rel="stylesheet" href="https://cdnjs.cloudflare.com/ajax/libs/font-awesome/5.15.2/css/all.min.css">
<style>
@import url("https://fonts.googleapis.com/css2?family=Rajdhani:wght@500&display=swap");
* {
margin: 0
}
.container {
display: flex;
flex-direction: column;
align-items: center;
padding-top: 50px;
background-color: #e1e3ea;
height: 100vh;
font-family: sans-serif;
}
.app {
width: 60%;
}
@media (max-width:768px) {
.app {
width: 90%;
}
}
.app h1 {
color: white;
font-size: 40px;
padding: 10px 0;
text-align: center;
border-radius: .5rem .5rem 0 0;
background-color: #de3f53;
font-family: "Rajdhani", sans-serif;
}
.app form {
display: flex;
width: 100%;
background-color: #262e4c;
}
.app form input {
border: none;
background-color: #3c4979;
font-size: 18px;
color: white;
padding: 10px;
width: 90%;
}
.app form button {
border: none;
color: white;
background-color: #1dd2af;
font-size: 25px;
font-weight: 600;
height: 42px;
width: 10%;
}
.app ul {
list-style: none;
color: #e0e0e0;
padding: 0;
}
.app ul li {
padding: 10px;
background-color: #262e4c;
border-bottom: 1px solid #3a4674;
}
.check {
width: 0.8em;
height: 0.8em;
cursor: pointer;
border-radius: 50%;
background-color: white;
border: 1px solid rgb(255, 255, 255);
-webkit-appearance: none;
}
.check:checked {
background-color: #1dd2af;
}
.task {
font-size: 18px;
padding: 0 10px;
width: fit-content;
background: transparent;
border: none;
color: #fff;
}
.task:focus {
outline: none;
}
.app ul li i {
float: right;
cursor: pointer;
}
.app ul li i:hover {
color: rgb(255, 82, 82);
}
.completed {
color: rgba(192, 192, 192, 0.8);
text-decoration: line-through;
}
</style>
</head>
<body>
<div class="container">
<div class="app">
<h1>TO DO LIST</h1>
<form>
<input type="text" placeholder="Add new task...">
<button type="submit">+</button>
</form>
<ul></ul>
</div>
</div>
<script>
// On app load, get all tasks from localStorage
window.onload = loadTasks;
// On form submit add task
document.querySelector("form").addEventListener("submit", e => {
e.preventDefault();
addTask();
});
function loadTasks() {
// check if localStorage has any tasks
// if not then return
if (localStorage.getItem("tasks") == null) return;
// Get the tasks from localStorage and convert it to an array
let tasks = Array.from(JSON.parse(localStorage.getItem("tasks")));
// Loop through the tasks and add them to the list
tasks.forEach(task => {
const list = document.querySelector("ul");
const li = document.createElement("li");
li.innerHTML = `<input type="checkbox" onclick="taskComplete(this)" class="check" ${task.completed ? 'checked' : ''}>
<input type="text" value="${task.task}" class="task ${task.completed ? 'completed' : ''}" onfocus="getCurrentTask(this)" onblur="editTask(this)">
<i class="fa fa-trash" onclick="removeTask(this)"></i>`;
list.insertBefore(li, list.children[0]);
});
}
function addTask() {
const task = document.querySelector("form input");
const list = document.querySelector("ul");
// return if task is empty
if (task.value === "") {
alert("Please add some task!");
return false;
}
// check is task already exist
if (document.querySelector(`input[value="${task.value}"]`)) {
alert("Task already exist!");
return false;
}
// add task to local storage
localStorage.setItem("tasks", JSON.stringify([...JSON.parse(localStorage.getItem("tasks") || "[]"), { task: task.value, completed: false }]));
// create list item, add innerHTML and append to ul
const li = document.createElement("li");
li.innerHTML = `<input type="checkbox" onclick="taskComplete(this)" class="check">
<input type="text" value="${task.value}" class="task" onfocus="getCurrentTask(this)" onblur="editTask(this)">
<i class="fa fa-trash" onclick="removeTask(this)"></i>`;
list.insertBefore(li, list.children[0]);
// clear input
task.value = "";
}
function taskComplete(event) {
let tasks = Array.from(JSON.parse(localStorage.getItem("tasks")));
tasks.forEach(task => {
if (task.task === event.nextElementSibling.value) {
task.completed = !task.completed;
}
});
localStorage.setItem("tasks", JSON.stringify(tasks));
event.nextElementSibling.classList.toggle("completed");
}
function removeTask(event) {
let tasks = Array.from(JSON.parse(localStorage.getItem("tasks")));
tasks.forEach(task => {
if (task.task === event.parentNode.children[1].value) {
// delete task
tasks.splice(tasks.indexOf(task), 1);
}
});
localStorage.setItem("tasks", JSON.stringify(tasks));
event.parentElement.remove();
}
// store current task to track changes
var currentTask = null;
// get current task
function getCurrentTask(event) {
currentTask = event.value;
}
// edit the task and update local storage
function editTask(event) {
let tasks = Array.from(JSON.parse(localStorage.getItem("tasks")));
// check if task is empty
if (event.value === "") {
alert("Task is empty!");
event.value = currentTask;
return;
}
// task already exist
tasks.forEach(task => {
if (task.task === event.value) {
alert("Task already exist!");
event.value = currentTask;
return;
}
});
// update task
tasks.forEach(task => {
if (task.task === currentTask) {
task.task = event.value;
}
});
// update local storage
localStorage.setItem("tasks", JSON.stringify(tasks));
}
</script>
</body>
</html>Conclusion
Finally, we have a working to-do list app. It is very simple to use and it is very easy to add new tasks.
You can add, edit, remove and mark tasks as completed. You can also save your tasks to local storage and load them when you open the app again.